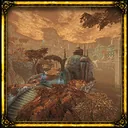
 Queen's Domain Map
Map / Siraatsu Castle
Siraatsu Castle
The Queen's castle at the end of the Ancient World bridge. Four seal breakers (Cups, Wands, Swords, Pentacles) open its locked rooms, and three boss fights light the sealed Foyer door to Queen Siraatsu, whose fight decides the ending.
- Way in
- Ancient World: solve the three power-tower puzzles to switch off the three blue lights sealing the big metal bridge, then beat Josami, Lord Saijha (4,000 Life, no known weakness) on the bridge.
- Leave with
- Ending 1, 2 or 3 (by the weapon that beats the Queen), Cups, Wands, Swords and Pentacles seal breakers, Iron Fist and Piercing Beam Cannon, Siraatsu's Data Module
- Steam achievement
- Halls of Hatred: Reach Siraatsu Castle. (14.0% of players)
- In the 100% tracker
- 33 entries: Crystal Monuments & Wing Altars: 4, Bosses: 6, Wind Gems, lenses & key items: 2, Main weapons: 3, Throwing weapons: 2, Accessories: 2, Orbewa Eggs: 4, Strange Silver Etched Skulls: 6, Hidden Bestiary entries: 4
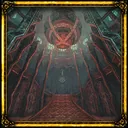
Route through Siraatsu Castle
- Cross the bridge and activate the Foyer monument. In the ground-floor hall, the right-hand branch of the left area ends at the Siraatsu Castle Wing Altar.
- Take the left-hand branch of the same area, drop into the deep pit and fly front-right along the platforms, then ride the lift up. The Iron Fist is on the iron-grating platform and the Plasma Knife under the stairs of the room at the top; upstairs, the 2F corner chest holds the Cups seal breaker.
- Back in the left-hand branch, the Cups door hides a chest with the Wands seal breaker. On the second-floor green-carpet corridor it opens the Wand room at the far right end, with five platters on the table: Roasted Poultry (Life), Broiled Meat (Attack), Grilled Fish, Steamed Clams and Baked Lobster.
- Castle Lords Obetda (1,200 Life, weak to Slash) and Ubhaer (1,700 Life, weak to Impact) are the first dual fight on the palace route. Keep both in view and hit whichever one commits with its matching weapon.
- In the dining room, the chest behind the bar holds the Swords seal breaker. The room left of the bar has a lift to a console room with the Piercing Beam Cannon; in the room after it, the corner chest holds the Pentacles seal breaker and a hidden wall by the wall-clinging skeleton hides Mystic's Mirror, and one of its passages leads to the Elevator Room monument.
- With the Pentacles seal breaker, the 1F right-hand coin door leads to a deep pit with the Spiked Ball chest beyond the iron tanks, and the coin room on the green-carpet corridor holds the Growth Apparatus. The sword room beside the first pit has a Small Energy Cell on its console.
- Follow the main route to the Halls of Disrepair monument. Before following the pipe out through the window, the door on the right holds the Quick Charger; in the abandoned incubation room, the orange seal in the right-hand room hides Siraatsu's Data Module, one of Ossi's 10.
- Dekanima Ritual Blood waits past the flooded hall with water, pipes and blood manta rays: climb the big red pipes and take the small door on the left near the end. Use Impact on the Tauropod (400 Life) and Pierce on the Stalker (350 Life), and keep room so they do not overlap.
- The High Spec Automatons are on the ground floor: Drilling Unit X (1,300 Life) is weak to Pierce, Besom Cutter Pro (1,800 Life) to Slash. With all three boss fights won, the sealed Foyer door opens.
- Make a manual backup before Queen Siraatsu (2,600 Life, no known weakness) and keep it for the other endings. Any weapon gives Ending 1; the True Holy Sword Akunra adds the Enraged Queen phase (5,000 Life) for Ending 2; Okbujo's Judgement leads to the Soul of Sipeha (9,999 Life) for Ending 3. Afterwards you wake on the beach on the same save.
Come back later for
- Blood Angel Josami Key from the Rotting Cavern blood ritual: the sword-seal room on the 2F green-carpet corridor holds the Josami Mechanical Mace.
- Hidden enemies to record before the final choice: the Albino Book Bug (attack the book in the storage room beside the bar), the Gilded Pus Bag (hidden wall on the right of the green-carpet corridor, opposite the room with two drilling units and a console) and Cosmic Bones (second one-way oil and water drop room, hidden wall on the empty right platform).
- Flying Mushroom Fossil (30 Silver Skulls at the Petrified Garden trader): fly to the highest ledge under the main hall ceiling for Silver Skull 42.
- Endings 2 to 4: return with Akunra, then with Okbujo's Judgement; Ending 4 also needs the Petrified Garden ritual, all 69 Silver Skulls and the Eat choice.
Crystal Monuments and Wing Altar
- Foyer (Siraatsu Castle)
- Wing Altar - Siraatsu Castle
- Lift Room (Siraatsu Castle)
- Halls of Disrepair
6 Silver Skulls here · 4 Orbewa Eggs here
The tracker lists all 33 entries in Siraatsu Castle; the Tracker Pass adds where each skull, egg, book, vault and hidden enemy is and what you need to reach it.
Open the 100% trackerBosses
| Boss | Life / ATK / weak to | Where and how |
|---|---|---|
| Duke Obetda & Duchess Ubhaer (Castle Lords)Siraatsu Castle | Duke Obetda: 1200 Life, 109 ATK Slash Duchess Ubhaer: 1700 Life, 82 ATK Impact | Siraatsu Castle, through the palace rooms beyond the Foyer monument. The first of the three fights that unlock the big Foyer door leading to Queen Siraatsu.Obetda is weak to Slash, Ubhaer to Impact. Keep both in view, use the matching weapon on whichever commits, then back out. |
| Dekanima Ritual Blood (Tauropod & Stalker)Siraatsu Castle | Ritual Blood Tauropod: 400 Life, 72 ATK Impact Ritual Blood Stalker: 350 Life, 103 ATK Pierce | Siraatsu Castle, the second of the three fights that unlock the big Foyer door; reached by the path to the blood pool, with a large red pipe overhead.Tauropod is weak to Impact, Stalker to Pierce. Keep room so they do not overlap. |
| High Spec Automatons (Drilling Unit X & Besom Cutter Pro)Siraatsu Castle | Drilling Unit X: 1300 Life, 91 ATK Pierce Besom Cutter Pro: 1800 Life, 68 ATK Slash | Siraatsu Castle, the third of the three fights that unlock the big Foyer door, in the castle's machine area after Dekanima Ritual Blood.Drilling Unit X is weak to Pierce, Besom Cutter Pro to Slash. Carry both weapon types and swap targets. |
| Queen SiraatsuSiraatsu Castle | 2600 Life, 60 ATK no weakness | Siraatsu Castle: behind the big door of the Foyer, which opens after the Castle Lords, Dekanima Ritual Blood and the High Spec Automatons. Back up your save before her final choice.No known weakness. Make an ending-lock backup (Backup A) before her choice, stay at range during unsafe patterns, and take short openings. |
| Enraged Queen SiraatsuSiraatsu Castle | 5000 Life, 85 ATK no weakness | Same arena as Queen Siraatsu behind the big Foyer door: she becomes the Enraged Queen as a second phase when you fight her with the True Holy Sword Akunra (Ending 2 route). |
| Soul of SipehaSiraatsu Castle | 9999 Life, 140 ATK no weakness | Same arena as Queen Siraatsu behind the big Foyer door: fight the Queen with Okbujo's Judgement (Ending 3 route) and the Soul of Sipeha appears. |
Weapons found here
| Weapon | Type / power / speed | Where |
|---|---|---|
| Josami Mechanical Mace | Siraatsu Castle, second-floor green-carpet corridor: the chest in the room with the sword seal, opened with the Blood Angel Josami Key from the Rotting Cavern. | |
| Piercing Beam Cannon | Siraatsu Castle: from the bar, enter the room on its left, ride the lift and follow the passage; the cannon lies on the console in the room after. | |
| Iron Fist | Physical 16 V. Slow | Siraatsu Castle, ground-floor left wing: drop into the pit and ride the lift up past the egg between the two vertical pipes; the chest is on the iron-grating platform. |
| Spiked Ball | Siraatsu Castle: through the pentacle door on the right of the ground-floor hall, drop into the pit, go front-left past the iron tanks and fly on to the platform beyond; chest. | |
| Plasma Knife | Siraatsu Castle, ground-floor left wing: past the Iron Fist platform keep riding the lift up, enter the room at the end; the chest is under the stairs. |
Enemies in Siraatsu Castle
Stats from the in-game Bestiary. Weak to = takes extra damage from that type.
| # | Enemy | Life | ATK | EXP | Weak to | Drops | Where |
|---|---|---|---|---|---|---|---|
| 101 | Pail Chopper | 415 | 67 | 750 | Impact | Roasted Cave Scorpion, Ancient Coin | |
| 102 | Aegis Wing | 290 | 62 | 563 | Slash | Pungent Root, Ancient Coin | |
| 103 | Drilling Unit | 620 | 72 | 1001 | Pierce | Large Elixir, Ancient Coin | |
| 104 | Mecha Knight | 950 | 76 | 1650 | Impact | Royal Dried Herbs, Badu Powder | |
| 105 | Besom Cutter | 1200 | 67 | 1700 | Slash | Cleansing Flower, Steel Ale | |
| 106 | Auger Impaler | 250 | 76 | 625 | Slash | Ancient Coin, Berserker's Brew | |
| 107 | Fated Wheel Dancer | 415 | 89 | 1111 | Impact | Grand Elixir, Ancient Coin | |
| 108 | Josami Berserker | 620 | 76 | 1060 | – | Ancient Coin, Grand Elixir | |
| 109 | Josami Sentinel | 300 | 95 | 940 | – | Ancient Coin, Idinti Soap | |
| 110 | Agate Thorny Gape | 380 | 78 | 906 | – | Panacea | |
| 111 | Tourmaline Chromobula | 300 | 955 | 844 | Slash | Brawler's Berries, Ancient Coin | |
| 112 | Regal Star Lizard | 360 | 1 | 245 | – | Fine Loot Sack | Hidden entry: location in the tracker |
| 113 | Drilling Unit X | 1300 | 91 | 2500 | Pierce | Part of the High Spec Automatons fight on the palace route. | |
| 114 | Besom Cutter Pro | 1800 | 68 | 2500 | Slash | Part of the High Spec Automatons fight on the palace route. | |
| 115 | Duke Obetda | 1200 | 109 | 2500 | Slash | First dual encounter on the Castle palace route. | |
| 116 | Duchess Ubhaer | 1700 | 82 | 2500 | Impact | First dual encounter on the Castle palace route. | |
| 117 | Ritual Blood Tauropod | 400 | 72 | 2500 | Impact | Dekanima Ritual Blood encounter after the Castle Lords. | |
| 118 | Ritual Blood Stalker | 350 | 103 | 2500 | Pierce | Dekanima Ritual Blood encounter after the Castle Lords. | |
| 119 | Queen Siraatsu | 2600 | 60 | 3800 | – | End of the Castle pass. | |
| 120 | Enraged Queen Siraatsu | 5000 | 85 | 5200 | – | Second phase of Queen Siraatsu when fought with the True Holy Sword Akunra. | |
| 121 | Soul of Sipeha | 9999 | 140 | 9999 | – | Triggered by fighting Queen Siraatsu with Okbujo's Judgement (Ending 3 route). | |
| 122 | Albino Book Bug | 900 | 85 | 2200 | – | Ancient Coin, Spirit Oil | Hidden entry: location in the tracker |
| 123 | Gilded Pus Bag | 5555 | 30 | 5555 | – | Gold Crown, Ancient Coin | Hidden entry: location in the tracker |
| 124 | Cosmic Bones | 1000 | 250 | 6666 | Impact | Rejuvenating Water, Grand Elixir | Hidden entry: location in the tracker |