 Queen's Domain Map
Map / Ancient World
Ancient World
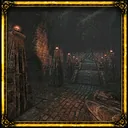
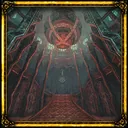
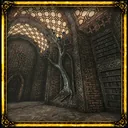
Pale machinery and green-lit circles at the bottom of the shaft from the Mausoleum. Ossi's orange Seal Breaker opens the Data Module seals, the Shock Rifle and the cobalt Seal Breaker open three blue pyramid power towers, Wind Gem #5 sits in a cave shrine, and with all three towers solved Josami, Lord Saijha guards the bridge to Siraatsu Castle.
- Way in
- Beat Poenir & Duenir in the Deimpo Mausoleum, then take the fissure behind King Gius Abraon down the ventilation shaft.
- Leave with
- Wind Gem #5, Shock Rifle, Orange Ochre Seal Breaker, Cobalt Seal Breaker, Jigeki key bottom piece, Mechanical Duck Figurine, Soldier's Shock Blade, Route to Siraatsu Castle
- Steam achievement
- Genesis: Reach the Ancient World. (22.9% of players)
- In the 100% tracker
- 53 entries: Crystal Monuments & Wing Altars: 5, Bosses: 2, Wind Gems, lenses & key items: 6, Main weapons: 7, Throwing weapons: 2, Accessories: 2, Orbewa Eggs: 5, Duck figurines: 1, Strange Silver Etched Skulls: 15, Hidden Bestiary entries: 8
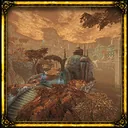
Route through Ancient World
- At the bottom of the shaft from Deimpo, go through the door frame to the Ventilation Shaft monument. The room past the long corridor has the chest with the Wind Blaster and an Energy Cell; in the flooded room after it, turn round and dash round the corner to the barred chest with the Grenades.
- Drop down the second big vent shaft and follow the pipes until the cave opens outdoors at the Overlook monument. Climb the stone stairs and keep up the slope past the cliff: the Machine Hammer is in the chest at the foot of the big tree.
- Hop the chain of small islands to the big island. Its left path climbs a rock pile to a power tower with a green seal door; the green Seal Breaker from the Mausoleum roof opens it for the Plasma Spear.
- Continue and jump to the high island opposite: the Ossi's Lab monument is at his door. Mechanical Engineer Ossi gives you the Orange Ochre Seal Breaker, which opens the orange C-shaped seals hiding the ten Data Modules, one per area. The Wing Altar - Ancient World is front-left of the lab doorway, and the round domed teleporter houses (two doors, walk the ring corridor) carry you between islands; the first is in the red-lit tunnel next to Ossi's house.
- From the Wing Altar, enter the teleport room on its left and take the right-hand passage. In the new area go through the cave, leave by its upper exit, turn left onto the iron cliff walkway and ride the elevator in the building down; past the deep-water corridor, the wall where a skeleton claws at it hides the room with the Shock Rifle (Ancient Technology).
- Solve the small practice node puzzle past the rifle room, pull the lever and ride the lift: the Training Band is one floor up and the Cobalt Seal Breaker one floor higher, beside a skeleton. The cobalt breaker is what lets you into the power towers.
- The three blue pyramid power towers keep the castle bridge shut. At the top of each, shoot nodes with the Shock Rifle: a shot powers the node and the nodes linked to it, a node powered twice goes dark, and the goal is every node lit. There is no reset, so save first; a console skips a puzzle for coins, and a finished tower shows no blue light from outside.
- Come outdoors from the elevator building by the big pit near the castle bridge and enter the cave straight ahead: Wind Gem #5 sits in its gazebo shrine, guarded by a Manticore that does not respawn. The tower that stands alone on its own island needs all five Wind Gems; reach it through the teleporter houses via the room with three metal crates and a skeleton.
- Back in the cave's upper level, turn right and cross with the Cestus double jump to the Scrap Yard monument. Climb to the power tower uphill, drop into the building and beat the Ancient Besom Cutter (2,900 Life, 60 ATK, weak to Slash, resists Pierce): sidestep its frontal swing and punish the recovery. It gives the Mechanical Duck Figurine; the lift up leads to the Soldier's Shock Blade chest behind the iron crates.
- Go back to the big bridge and drop into the hidden cave below it: the Jigeki key bottom piece is on the altar. With all three towers solved the bridge's three blue lights go out, and Josami, Lord Saijha (4,000 Life, 75 ATK, no weakness) guards it: use range to reposition, take one short punish after his committed attack, and get far out of his giant laser rather than hiding behind a pillar (Sworn Protector). The bridge leads to Siraatsu Castle.
Come back later for
- Strange Explorer: hand all 10 Data Modules to Ossi, change area or rest, and come back; it attacks in the lab and drops the Explorer's Cudgel (Wise Work).
- Hidden enemies: Arch Sepiicanis behind the boxes by the food platter where you drop into the Shock Rifle lab, Furtive Nautigallus by the scrapped robots near the Scrap Yard monument, King Upobna in the hidden wall between the fishman-shaped fliers at the upper fish pond.
- Record of Sin: from the skeleton campfire on the second floor of the Wave Gun tower (small island opposite the Wind Gem cave), after the first Siraatsu pass.
- The hidden building on the high cliffs above the Plasma Spear tower (Small Energy Cell, five meals, Silver Skulls), with the Flying Mushroom Fossil.
Crystal Monuments and Wing Altar
- Ventilation Shaft
- Overlook (Ancient World)
- Ossi's Lab
- Wing Altar - Ancient World
- Scrap Yard (Ancient World)
15 Silver Skulls here · 5 Orbewa Eggs here
The tracker lists all 53 entries in Ancient World; the Tracker Pass adds where each skull, egg, book, vault and hidden enemy is and what you need to reach it.
Open the 100% trackerBosses
| Boss | Life / ATK / weak to | Where and how |
|---|---|---|
| Ancient Besom CutterAncient World | 2900 Life, 60 ATK Slash | Ancient World, Scrap Yard island: from the Scrap Yard monument go straight and up the path on the left of the building; drop down and enter the power tower. The Besom Cutter fights you inside.Weak to Slash, resists Pierce. Sidestep the committed frontal swing and punish only in the recovery. |
| Josami Lord SaijhaAncient World | 4000 Life, 75 ATK no weakness | Ancient World, on the way into Siraatsu Castle: fought after the Ancient Besom Cutter and the seal-breaker puzzles. Beating him opens the castle and the Siraatsu Foyer monument.No known weakness. Use range to reposition and take a single short punish window after his committed attack rather than extending a combo. |
Weapons found here
| Weapon | Type / power / speed | Where |
|---|---|---|
| Explorer's Cudgel | Ancient World, Ossi's lab: hand all 10 Data Modules to Ossi, change area and come back; beat the Strange Explorer who appears and take its drop. | |
| Soldier's Shock Blade | Ancient World power tower past the scrapyard monument: after beating the Ancient Besom Cutter inside (Mechanical Duck), ride the lift up; the chest is behind the iron crates. | |
| Machine Hammer | Ancient World Overlook monument: climb the stone stairs and keep following the slope uphill past the cliff; the chest is at the foot of the big tree. | |
| Plasma Spear | Ancient World main island past the Overlook: take the left path, climb the rock pile to the high ledge and open the power tower door with the green Seal Breaker; chest inside. | |
| Wind Blaster | Ancient World, ventilation shaft monument at the bottom of the shaft from Deimpo: go through the long corridor; the chest is in the room beyond it (with an Energy Cell). | |
| Wave Gun | Ancient World main island: leave the Wind Gem cave, fly to the small island opposite and go into its power tower; chest inside. Its second floor is the way to Record of Sin. | |
| Shock Rifle | Underground lab via the teleport room left of the Ancient World Wing Altar: elevator down, past the deep-water corridor, hidden wall where a skeleton claws the wall; chest in the room behind. | |
| High Performance Blade | Ancient World main island: follow the area on the right of the big bridge to the building at its end; the chest is in its left corner. | |
| Grenade | Ventilation shaft from Deimpo into the Ancient World, past the bottom monument: in the flooded room, turn round and air-dash round the corner to the chest behind bars. |
Enemies in Ancient World
Stats from the in-game Bestiary. Weak to = takes extra damage from that type.
| # | Enemy | Life | ATK | EXP | Weak to | Drops | Where |
|---|---|---|---|---|---|---|---|
| 78 | Sapphire Rhino | 250 | 550 | 480 | Slash | Royal Dried Herbs | |
| 79 | Ungulacrita | 400 | 67 | 844 | Slash | Roasted Cave Scorpion, Royal Dried Herbs | |
| 80 | Scarlet Watcher | 85 | 50 | 307 | – | Pungent Root, Roasted Ojum Lizard | |
| 81 | Ochre Coelacuda | 200 | 50 | 445 | Slash | Ancient Coin, Berserker's Brew | |
| 82 | Vermilion Homopiscium | 300 | 45 | 600 | Pierce | Royal Dried Herbs, Idinti Soap | |
| 83 | Sepiicanis | 220 | 62 | 640 | – | Royal Dried Herbs, Panacea | |
| 84 | Nautigallus | 466 | 35 | 844 | Pierce | Badu Powder, Grand Elixir | |
| 85 | Dolomite Golem | 200 | 35 | 333 | – | Radiant Fruit, Ancient Coin | |
| 86 | Viscous Thorny Gape | 415 | 44 | 660 | – | Wing Stone Fragment | |
| 87 | Ancient Pail Chopper | 311 | 56 | 540 | Impact | Roasted Ojum Lizard, Ancient Coin | |
| 88 | Ancient Aegis Wing | 160 | 47 | 386 | Slash | Freshly Dried Herbs, Ancient Coin | |
| 89 | Ancient Drilling Unit | 428 | 54 | 700 | Pierce | Ancient Coin, Grand Elixir | |
| 90 | Ancient Mecha Knight | 770 | 76 | 1400 | Impact | Roasted Ojum Lizard, Royal Dried Herbs | |
| 91 | Ghost Manticore | 1200 | 76 | 2500 | Slash | Spirit Oil, Grand Elixir | Hidden entry: location in the tracker |
| 92 | Raging Star Lizard | 600 | 76 | 1600 | – | Gold Star Lizard Statuette, Berserker's Brew | Hidden entry: location in the tracker |
| 93 | Deep Star Lizard | 270 | 1 | 200 | – | Slimy Loot Sack | Hidden entry: location in the tracker |
| 94 | Ancient Besom Cutter | 2900 | 60 | 5000 | Slash | Blocks the last electro-puzzle route after the orange, cobalt and green seal-breaker work. | |
| 95 | Josami Lord Saijha | 4000 | 75 | 8000 | – | Beyond the Ancient Besom Cutter; his defeat opens the first Siraatsu Castle pass. | |
| 96 | King Upobna | 480 | 50 | 1200 | Pierce | Brawler's Berries, Ancient Coin | Hidden entry: location in the tracker |
| 97 | Strange Explorer | 1800 | 160 | 5555 | Pierce | Hidden entry: location in the tracker | |
| 98 | Arch Sepiicanis | 773 | 95 | 2000 | – | Spirit Oil | Hidden entry: location in the tracker |
| 99 | Furtive Nautigallus | 1336 | 1336 | 2400 | Pierce | Rejuvenating Water | Hidden entry: location in the tracker |
| 100 | Aureate Ratty Bug | 480 | 75 | 2000 | Slash | Ancient Coin, Ancient Coin | Hidden entry: location in the tracker |