 Queen's Domain Map
Map / Obmuer Temple
Obmuer Temple
The flooded temple southwest of the Isle. Four slates open the door, three Trident Keys open its inner rooms, and Dagoom the Sea King waits behind three royal-guard arenas. You leave with the third Wind Gem.
- Way in
- Two air dashes across the southwest broken bridge from the Isle (Endu + Wind Gem #2).
- Leave with
- Wind Gem #3 (third air dash), Trident, Splash Hammer, Piercing Needle, beacon #2 lit
- Steam achievement
- Ocean Walk: Reach the Obmuer Temple. (63.3% of players)
- In the 100% tracker
- 43 entries: Crystal Monuments & Wing Altars: 6, Bosses: 3, Wind Gems, lenses & key items: 4, Main weapons: 4, Throwing weapons: 1, Accessories: 5, Orbewa Eggs: 6, Duck figurines: 1, Lost books: 2, Strange Silver Etched Skulls: 5, Hidden Bestiary entries: 6
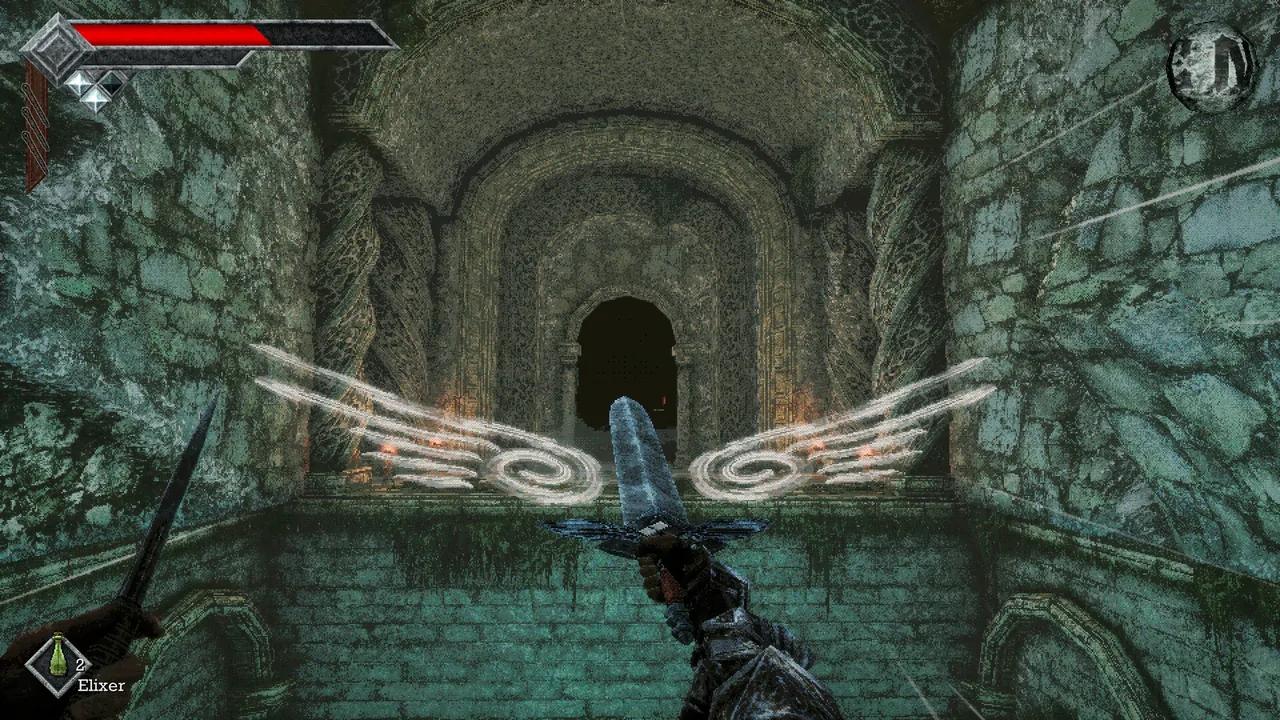
Route through Obmuer Temple
- Talk to Aganmi at the camp and activate the monument. Fight Coelacuda from dry ground.
- At the round, moss-covered tower in the shallow water, take Slate #1 from the dry rock on the left (skeletons spawn after). Circle right and dash over the broken wall on the right for Slate #2.
- Take the Trident from the statue outside the temple. The southwest pillar holds Slate #3; dash to the sinking platform to the northeast for Slate #4. Open the entrance and activate the Cave Entrance monument.
- Follow the water flow down for the Sapphire Trident Key and use it on the one-key door on the left. Leave the sealed three-key door for later.
- Air-dash into the upper-left passage. The skeleton ledge holds the Emerald Key; Wind Gem #3 is in this branch. Use Emerald, activate Sacred Cistern and open the shortcut lever.
- On the dark central path, reach the ledge for the Piercing Needle chest. Activate Prison Corridor and work the keyed side rooms toward the cavern.
- In the cavern, take the Gold Conch Necklace behind the staircase and beat the three royal guards: Yepo, Erda and Wami. Dash to the chest for the Splash Hammer before the boss door.
- Dagoom the Sea King (1,500 Life, no weakness): keep circling, dash out of whirlpools and poison, and kill the Toxic Serfs first.
- After the boss, meet Erma in the left cave (Orbewa Egg quest) and light the gargoyle near her: beacon #2. Fast travel back to the Isle and light the final beacon.
Come back later for
- The sealed three-Trident-Key door (Engraved Halberd).
- Jigeki Lens branch behind the serpent-relief double door, once you hold all three Jigeki key pieces and the four tiaras.
- Gold Nautilus Crown in a hidden underground area, needs the fully upgraded Holy Sword.
Crystal Monuments and Wing Altar
- Aganmi's Camp: On the Isle's west side, cross the broken bridge with two air dashes. The monument is beside Aganmi's camp on the far side, at the edge of the flooded ruins outside Obmuer Temple.
- Cave Entrance (Obmuer Temple): Just inside Obmuer Temple's main gate, at the back of the flooded ruins. The gate opens once the four Triangular Slates from the ruins are placed; the monument is right at the entrance.
- Sacred Cistern: From Cave Entrance follow the water down to the first flooded chamber and use the Sapphire Trident Key (in the wall below the Explorer's Note ledge) on the one-socket door on the left. The monument is just beyond, above the large pit.
- Prison Corridor: From Sacred Cistern collect Wind Gem 3 in the pit's lower passage, cross the big interior gap with three dashes and follow the dark central path. The monument is in the room with several Trident-key sockets.
- Lift Room (Obmuer Temple): Right after Dagoom the Sea King: the boss area exits by a large elevator and the monument is behind it. A Silver Skull lies under the same elevator and a secret wall is to the monument's left.
- Wing Altar - Obmuer Temple: On the surface after Dagoom: leave the temple by the Lift Room elevator, go up onto the platform with the round hole in its centre and carry on forward. The altar is in the open ahead, with thick bushes to its left.
Bosses
| Boss | Life / ATK / weak to | Where and how |
|---|---|---|
| Dagoom the Sea KingObmuer Temple | 1500 Life, 27 ATK no weakness | Obmuer Temple: from the Prison Corridor monument follow the central path into the big cavern. The boss door opens once the three Royal Orbewa Guards are beaten; the Lift Room monument is just past the arena.No physical weakness. Keep moving, air-dash out of poison clouds, whirlpools and water jets, and kill the Toxic Serfs before they crowd the arena; charged Torch fire works when a close opening is unsafe. |
| Royal Orbewa Guard (Yepo, Erda, Wami)Obmuer Temple | Yepo of the Royal Orbewa Guard: 200 Life, 30 ATK no weakness Erda of the Royal Orbewa Guard: 250 Life, 25 ATK Pierce Wami of the Royal Orbewa Guard: 300 Life, 25 ATK Pierce | In the big cavern past the Prison Corridor monument. Yepo and Erda wait below the drops near the staircase with the Gold Conch Necklace chest; Wami is further on, past the waterfall. All three open Dagoom's door. |
| Irdunuub, Priestess of JigekiObmuer Temple | 1300 Life, 60 ATK no weakness | Jigeki's Temple below Obmuer: at the fishman statue where the Trident lies (by Aganmi's Camp), set the four Ceremonial Stone Tiaras and drop into the pit. Go straight on to the big serpent door; the arena is Muagyo's Congregation.No verified weakness. Keep ranged pressure as she walks in and take one melee opening only after her committed approach. |
Weapons found here
| Weapon | Type / power / speed | Where |
|---|---|---|
| Trident | Pierce 8 Avg | Obmuer Temple approach, near Aganmi's Camp monument: it stands in front of the fishman statue outside the temple entrance. It breaks at weapon Lv. 5 and leaves a Trident Key. |
| Engraved Halberd | PierceSlash 11 Avg | Obmuer Temple, first water rooms past the Cave Entrance monument: the sealed door with three Trident Key slots; the chest is behind it. |
| Splash Hammer | Impact 15 Slow | Obmuer Temple, royal-guard cavern past the Prison Corridor monument: after dropping down and beating the guards Yepo and Erda, the chest is in the rock cave before Dagoom. |
| Wraith Blade | Chest at the stranded Iryupe raider shipwreck by Obmuer Temple, opened with the raiders' chest key that Aganmi gives for all five Fallen Raider Necklaces. | |
| Piercing Needle | Pierce 5 Fast | Obmuer Temple past the Sacred Cistern monument: in the dark temple, jump up the stones to the upper platform above the skeleton; chest. |
Enemies in Obmuer Temple
Stats from the in-game Bestiary. Weak to = takes extra damage from that type.
| # | Enemy | Life | ATK | EXP | Weak to | Drops | Where |
|---|---|---|---|---|---|---|---|
| 16 | Red Nibbler | 30 | 14 | 64 | Slash | Brawler's Berries | Flooded approach to the temple |
| 17 | Hardshell Meganeura | 105 | 16 | 112 | Impact | Roasted Cave Scorpion, Dried Herbs | Upper temple routes |
| 18 | Barnacle | 40 | 17 | 90 | – | Badu Powder, Dried Herbs | Temple water rooms |
| 19 | Skeletal Warrior | 100 | 21 | 158 | Impact | Dried Herbs, Ancient Coin | |
| 20 | Skeletal Soldier | 160 | 21 | 231 | Impact | Ancient Coin, Elixir | |
| 21 | Skeletal Arbelist | 70 | 21 | 158 | Impact | Freshly Dried Herbs, Ancient Coin | |
| 22 | Homopiscium | 112 | 20 | 158 | Pierce | Roasted Ojum Lizard, Freshly Dried Herbs | First interior pools |
| 23 | Toxic Homopiscium | 100 | 10 | 231 | Pierce | Elixir, Ancient Coin | Poison-water rooms |
| 24 | Glaucusion | 60 | 30 | 171 | Slash | Iron Pineapple, Idinti Soap | Approach and side rooms |
| 25 | Baleful Chilopoda | 105 | 22 | 171 | Pierce | Dried Herbs, Pungent Root | Upper-left key branch |
| 26 | Yepo of the Royal Orbewa Guard | 200 | 30 | 400 | – | Silver Conch Necklace | First of the three royal-guard arenas inside the temple (first royal-guard arena). |
| 27 | Erda of the Royal Orbewa Guard | 250 | 25 | 400 | Pierce | Silver Nautilus Crown | Royal-guard arena in the southeast of the temple. |
| 28 | Wami of the Royal Orbewa Guard | 300 | 25 | 150 | Pierce | Silver Scallop Tiara | Royal-guard arena in the west of the temple. |
| 29 | Aquatic Star Lizard | 100 | 0 | 48 | – | Rancid Loot Sack | Obmuer Temple: on the wall right of the platform at Aganmi's Camp, on the slope opposite the Cave Entrance monument, behind a rock after the Prison Corridor hall. Drops Rancid Loot Sack. |
| 30 | Dagoom the Sea King | 1500 | 27 | 3000 | – | Obmuer Temple boss; reached once the three royal collectibles open the boss door. | |
| 31 | Toxic Serf | 70 | 5 | 48 | Slash | Summoned during the Dagoom the Sea King fight in the boss arena past the Prison Corridor royal-guard cavern; kill one before ending the fight. | |
| 32 | Homopiscium Priest | 300 | 67 | 999 | Pierce | Royal Dried Herbs, Ancient Coin | On the top surface of Obmuer Temple, reached from the Obmuer Wing Altar area once the interior route has opened that approach. |
| 33 | Rotten Thorny Gape | 100 | 30 | 230 | – | Ancient Coin, Panacea | Obmuer Temple, three royal-guard area: go to the far lower back wall; the hidden wall just before the slope up to dry ground opens the way. |
| 34 | Flesh Gargoyle | 200 | 140 | 1300 | Slash | Berserker's Brew, Rejuvenating Water | Top of the island above Erma's cave by Obmuer Temple, near the pointed rock wrapped in a spiral of cloth. |
| 35 | Treacherous Sea Prince | 2000 | 127 | 3500 | – | Spirit Oil | Erma's cave by Obmuer Temple: after delivering every Orbewa Egg, leave and come back; it appears at Erma's spot. |
| 171 | Irdunuub, Priestess of Jigeki | 1300 | 60 | 2100 | – | Hidden boss route behind the tall serpent-relief double door (gold diamond seal) in Obmuer Temple's upper royal-collectible area; arena is Muagyo's Congregation (Steam bestiary guide instead says Jigeki's temple in Verdant Hollow). |